There’s nothing quite as frustrating as preparing to make a fresh, healthy juice, only to find your juicer dripping or spilling its precious contents onto your countertop. A leaking juicer doesn’t just create a mess; it wastes valuable juice and can indicate an underlying issue that needs attention. But don’t despair! Most juicer leaks are simple to diagnose and fix with a bit of troubleshooting. This guide will walk you through identifying the common culprits behind a leaky juicer and provide step-by-step solutions to get your appliance back to its peak, leak-free performance.
Understanding Your Juicer: Common Leak Points and Why They Happen
Before diving into repairs, it’s helpful to understand why juicers leak. Whether you own a centrifugal juicer that rapidly grates produce or a masticating (slow) juicer that presses it, both types rely on precise assembly and intact seals to contain liquids. Leaks typically stem from a few key areas and underlying issues.
Common leak points include the juice spout, the base of the machine where the chamber connects, and the pulp outlet. Small drips are sometimes normal, especially during heavy use, but excessive leakage indicates a problem. The primary reasons for these unwelcome spills often involve:
- Improper Assembly: This is perhaps the most frequent cause. If components like the juicing chamber, auger, lid, or pulp container aren’t seated correctly or locked into place, gaps can form, allowing juice to escape.
- Worn or Damaged Seals and Gaskets: Over time, the rubber or silicone seals and gaskets designed to create watertight barriers can degrade, crack, warp, or become dislodged. These vital components are often found around the juicing screen, auger, or inside the juice spout.
- Clogging: When the juicing screen or pulp chute becomes blocked with fibrous material, juice can back up within the machine, creating pressure that forces liquid out through unintended pathways. Stringy produce like celery is a common culprit for blocking internal seals.
- Cracked or Broken Parts: Accidental drops, high-impact use, or even thermal shock from washing hot parts in cold water can cause cracks in the plastic housing, juice collection bowls, or spouts.
- Overfilling or Rushing: Feeding too much produce into the chute at once or pushing ingredients through too quickly can overwhelm the juicer, leading to backup and subsequent leakage.
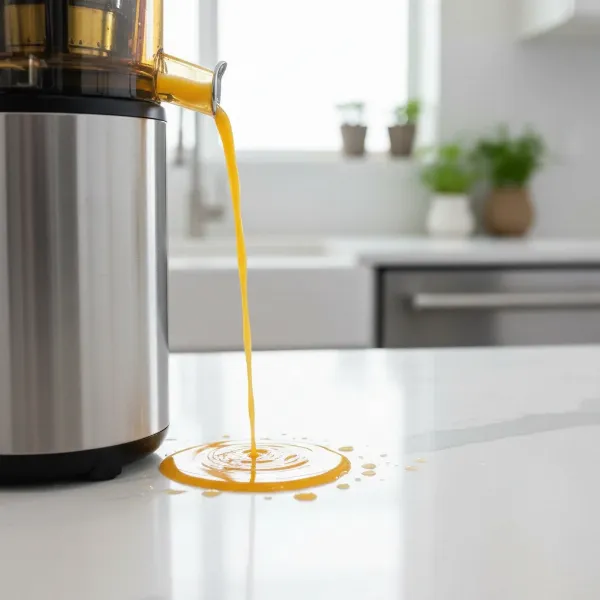 A close-up image of a juicer with juice dripping from its base onto a kitchen counter.
Essential Preparations and Tools for Juicer Troubleshooting
Before you begin diagnosing and fixing your leaking juicer, safety and preparation are paramount. Always unplug your juicer from the power outlet before handling any parts to prevent electrical hazards. Once unplugged, gather a few basic tools that will assist you in the process:
- Cleaning brushes: A small, narrow cleaning brush (often included with juicers) is essential for clearing pulp buildup from intricate parts and seals.
- Soft cloths or sponges: For general cleaning and drying.
- Mild dish soap: For thorough cleaning of components.
- Screwdriver set (optional): For some models, you might need to tighten loose screws, though this is less common for typical home juicers.
- Gloves: To protect your hands during cleaning and handling.
Starting with a clean, dry juicer is crucial. Disassemble all removable parts and give them a thorough wash. This ensures that no residual pulp or debris is mimicking a leak or preventing proper reassembly.
Step-by-Step Guide: Diagnosing and Fixing Your Leaking Juicer
With your juicer unplugged and cleaned, you’re ready to systematically tackle the leak. Follow these steps to pinpoint the problem and implement the solution.
1. Check Assembly and Alignment
Improper assembly is a leading cause of leaks. Even a slight misalignment can compromise the seal integrity of your juicer.
- Verify Each Component: Carefully reassemble your juicer, referring to your user manual if necessary. Ensure the juicing chamber, filter basket, auger (for masticating juicers), and lid are all securely seated and locked into place. Listen for audible clicks that confirm parts are engaged.
- Pulp Container and Juice Spout: For models with detachable pulp containers and juice spouts, ensure they are fully pushed into position and correctly seated. A small gap can cause leaks.
- Mid-Gear Check: On some vertical slow juicers, an internal mid-gear needs to be firmly in place. Double-check its position if your juicer features one.
- Locking Mechanism: Confirm that any locking arms or clasps are fully engaged and holding the top components securely to the base. Never force parts together; if they don’t fit, they are likely misaligned.
|
Our Picks for the Best Juicer in 2026
As an Amazon Associate I earn from qualifying purchases.
|
||
| Num | Product | Action |
|---|---|---|
| 1 | Juicer Machines, 5.3\" Wide Feed Chute Cold Press Juicer for Whole Vegetables & Fruits, High Juice Yield, BPA Free (Slivery) |

|
| 2 | Qcen Juicer Machine, 800W Centrifugal Juicer Extractor with Wide Mouth 3” Feed Chute for Fruit Vegetable, Easy to Clean, Stainless Steel, BPA-free (Black) |
|
| 3 | AMZCHEF Cold Press Juicer, Juicers Machines - 5.4\" Large Feed Chute for Whole Fruits & Vegetables, Stainless Steel Slow Masticating Juice Easy to Clean, Large Auger, Triple Strainers |
|
| 4 | Ninja NeverClog Cold Press Juicer, Powerful Slow Juicer with Total Pulp Control, Countertop, Electric, 2 Pulp Functions, Dishwasher Safe, 2nd Generation, Charcoal, JC151 |
|
| 5 | Qcen Juicer Machine, 500W Centrifugal Juicer Extractor with Wide Mouth 3” Feed Chute for Fruit Vegetable, Easy to Clean, Stainless Steel, BPA-free (Black) |
|
| 6 | Ninja NeverClog Cold Press Juicer, Powerful Slow Juicer with Total Pulp Control, Countertop, Electric, 2 Pulp Functions, Dishwasher Safe, 2nd Generation, Blue/Navy, JC151NV |
|
| 7 | Hamilton Beach Juicer Machine, Big Mouth 3” Feed Chute for Whole Fruits and Vegetables, Easy to Clean, Centrifugal Extractor, Vegetable & Fruit Juicer, BPA Free, 800W Motor, Black |
|
| 8 | Juicer Machines, Juilist 3\" Wide Mouth Juicer Extractor Max Power 800W, for Vegetable and Fruit with 3-Speed Setting, 400W Motor, Easy to Clean |
|
| 9 | Cold Press Juicer Machines with 5.8\" Large Feed Chute, Juicer for Whole Vegetables & Fruits, High Juice Yield (Grey) |
|
| 10 | Juicer Machines with 5.8\" Large Feed Chute, Cold Press Juicer for Whole Vegetables and Fruits 400W, Slow Masticating juicer Easy to Clean Juice Extractor Machine High Juice Yield |
|
2. Inspect Seals and Gaskets for Wear or Damage
Seals and gaskets are the unsung heroes of a leak-free juicer. Any compromise to these components can lead to leaks.
- Locate All Seals: Identify all removable silicone or rubber seals, including those around the juicing screen, the auger’s base, the juice spout flap, and any O-rings.
- Examine for Damage: Carefully inspect each seal for signs of wear and tear: cracks, tears, hardening, discoloration, or warping. Even subtle damage can break the watertight seal. Look for embedded debris that might be preventing a tight fit.
- Re-seat or Replace: If a seal is simply dislodged, gently re-seat it into its groove. If it shows signs of damage, it needs to be replaced. Most manufacturers offer replacement parts online or through their customer service.
3. Address Clogs and Blocked Filters
A clogged juicing screen or pulp chute can prevent juice from flowing correctly, forcing it to escape elsewhere.
- Thorough Screen Cleaning: The fine mesh of the juicing screen can easily become clogged with fibrous pulp, especially after juicing ingredients like celery, ginger, or leafy greens. Use the stiff brush provided with your juicer (or a dedicated cleaning brush) to scrub the screen under running water, both inside and out. Pay close attention to individual pores.
- Deep Cleaning for Stubborn Clogs: For heavily clogged screens, soak the screen in a solution of warm soapy water, or a 50/50 mixture of white vinegar and water, or even a dilute bleach solution (50/50 bleach and water) for about 20 minutes. Then, scrub vigorously with a brush and rinse thoroughly. Lemon juice and water can also be effective for descaling and cleaning.
- Clear the Pulp Chute: Ensure the pulp ejection chute is completely free of blockages. Sometimes, dry pulp can accumulate and harden, obstructing the flow.
4. Examine for Cracks and Damage to Housing and Parts
Physical damage to your juicer’s components can create permanent leak points.
- Inspect Plastic Components: Carefully check the juice collection chamber, pulp container, juice spout, and the main housing for any visible cracks, chips, or warping. Run your fingers along edges and seams to detect hairline fractures.
- Heat Damage: Avoid washing juicer parts in excessively hot or boiling water, as temperatures above 80 degrees Celsius can cause plastic components to deform, leading to misalignment and leaks. Similarly, never dry parts in an oven or on a heater.
- Replacement: If you find a cracked part, it will almost certainly need to be replaced. Contact your juicer’s manufacturer for genuine replacement parts.
5. Adjust Juicing Habits
Sometimes, the way you use your juicer contributes to leaks.
- Avoid Overfilling: Do not jam large quantities of fruits or vegetables into the feed chute all at once. Overfilling can create excessive pressure inside the juicing chamber, causing juice to back up and leak.
- Pace Your Juicing: Feed produce slowly, allowing the auger or blade sufficient time to process each piece before adding more. This is particularly important for slow juicers. If you notice juice backing up in the chute, pause and let the machine catch up.
- Manage Stringy Produce: Fibrous ingredients like celery or kale can sometimes get tangled and lift seals or create blockages. Process them in smaller pieces and alternate them with other, less fibrous ingredients. Ensure the pulp lever (if present) is in the closed position while juicing.
6. Tighten Loose Connections (If Applicable)
While less common for standard home juicers, some models, especially commercial or heavy-duty units, may have bolts or screws that can loosen over time due to vibration.
- Check Securement Points: If your juicer has external screws or bolts, particularly on the base or around the motor housing, check that they are snug.
- Exercise Caution: If you do tighten any fasteners, do so gently. Overtightening can strip plastic threads or crack housing components. This step is usually only relevant for specific models, and consulting your user manual is advised.
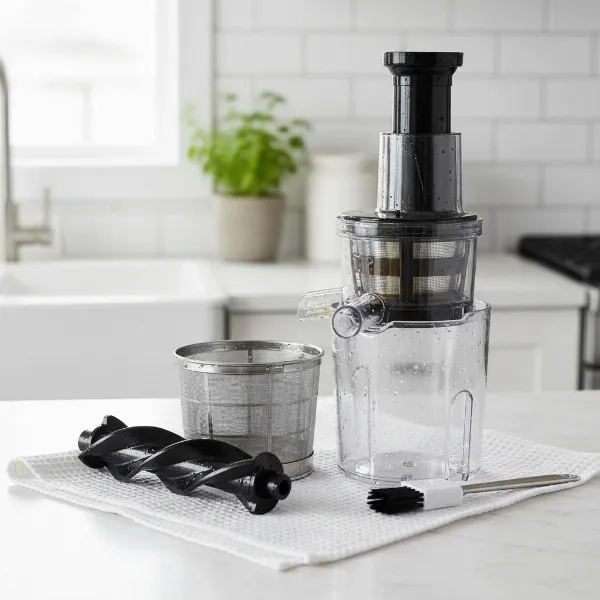 Various disassembled juicer parts laid out for cleaning, including the auger, filter, and chamber, with a small brush nearby.
Proactive Maintenance: Preventing Future Leaks
An ounce of prevention is worth a pound of cure, especially when it comes to keeping your juicer in top condition and preventing future leaks. Integrating these maintenance tips into your routine will extend the life of your appliance and ensure consistently smooth operation.
- Immediate and Thorough Cleaning: The most critical step in preventing leaks is to clean your juicer immediately after every use. Pulp and juice residue can dry and harden, making it difficult to remove and potentially blocking seals or screens. Disassemble all removable parts and wash them with warm, soapy water. Use the provided cleaning brush to thoroughly scrub the mesh screen and any intricate grooves or corners where pulp can accumulate.
- Inspect Seals Regularly: Make it a habit to inspect all seals and gaskets for any signs of wear, tear, or damage during cleaning. If you notice them becoming brittle, cracked, or stretched, replace them promptly. Keeping a spare set of common seals on hand can save you hassle.
- Proper Storage: Store your juicer and its disassembled parts in a clean, dry place. Ensure seals are not stored in a way that might compress or distort them.
- Follow Manufacturer Guidelines: Always adhere to your juicer’s user manual for specific cleaning instructions, maximum fill levels, and suitable produce types. Overloading the motor or processing non-recommended ingredients can stress the machine and lead to component failure and leaks.
- Avoid Harsh Cleaners and High Heat: While a dilute bleach soak is okay for screens occasionally, avoid harsh abrasive cleaners or extremely hot water for regular cleaning, as these can degrade plastic and rubber components over time.
When to Seek Professional Help or Consider a New Juicer
While many juicer leaks are easily fixed at home, there are times when professional intervention or even a replacement might be the best course of action.
If you’ve meticulously followed all troubleshooting steps and your juicer continues to leak, or if you discover significant damage such as a cracked motor housing or a non-functioning motor, it might be time to consider your options. Repairing complex electrical or mechanical failures often requires specialized tools and expertise.
Consider professional help if:
- The leak persists despite trying all suggested fixes.
- You suspect a problem with internal motor components or electrical wiring.
- You identify major cracks in the main body or non-replaceable parts.
Consider a new juicer if:
- The cost of replacement parts or professional repair approaches the price of a new unit.
- Your juicer is an older model and parts are difficult or impossible to find.
- You’re experiencing recurring issues beyond just leaks, indicating the machine is reaching the end of its lifespan.
- The manufacturer’s warranty covers the issue, making a replacement or repair free.
For replacement parts or authorized service, always consult your juicer’s manufacturer directly or check their official website. Reputable appliance parts retailers may also carry genuine components.
Your Buying Guide: Choosing a Leak-Resistant Juicer
When investing in a new juicer, or simply upgrading, being mindful of features that contribute to leak prevention can save you future headaches. A well-designed juicer will inherently minimize the risk of spills and offer greater longevity.
- Material Quality: Opt for juicers made with high-quality, durable plastics (like BPA-free Tritan) or stainless steel components. These materials are less prone to cracking, warping, or degrading over time. Stronger materials in critical areas like the juicing chamber and pulp chute ensure they can withstand regular use and pressure without developing vulnerabilities.
- Robust Seal Design: Pay close attention to the design and quality of seals and gaskets. Look for juicers that feature thick, well-fitted silicone or rubber seals that are easy to remove for cleaning but create a tight, secure barrier when assembled. Some models feature double-sealing mechanisms for extra protection.
- Ease of Assembly and Disassembly: A juicer that is intuitive and straightforward to assemble and disassemble correctly reduces the chance of misalignment, which is a prime cause of leaks. Clear markings or foolproof designs can be a major advantage.
- Efficient Pulp Ejection System: Good juicers are designed to efficiently expel pulp, preventing blockages that can lead to juice backup and leaks. Look for models with wide pulp chutes and powerful motors that can handle a variety of produce without straining.
- Reputation and Reviews: Research user reviews specifically for complaints about leaks. Brands known for their durability and excellent customer support regarding parts and service are often a safer bet. A strong warranty can also be an indicator of a manufacturer’s confidence in their product’s leak resistance and overall quality.
- Reverse Function: For masticating juicers, a reverse function can be incredibly useful. It helps dislodge stuck produce and prevent clogs, thereby reducing internal pressure and the risk of leaks.
> “The secret to a long-lasting, leak-free juicer often boils down to two things: proper assembly and diligent cleaning. Neglect either, and you’re inviting drips.” – Admin, JuicerBest.com
Conclusion
A leaking juicer doesn’t have to spell the end for your healthy juicing habits. By understanding the common causes—from simple assembly errors and worn seals to clogs and damaged parts—you can effectively troubleshoot and resolve most issues yourself. Prioritizing correct assembly, routine and thorough cleaning, and mindful juicing habits are your best defense against unexpected spills. When it’s time for a new appliance, remember to look for quality materials and intelligent design to ensure your next juicer provides many years of leak-free operation. So go ahead, confidently fix your juicer, and get back to enjoying fresh, delicious, and mess-free homemade juices! What’s your favorite juice recipe to celebrate a leak-free machine?
Frequently Asked Questions
Is a few drops of leakage normal for a juicer?
A few quarter-sized droplets of juice on the base of your juicer can be normal, especially when loading produce or opening the juicer cap. However, excessive or continuous leaking usually indicates an underlying problem that should be addressed.
How often should I replace my juicer’s seals and gaskets?
The lifespan of seals and gaskets varies based on usage and care, but it’s a good practice to inspect them regularly (e.g., monthly). Replace them if you notice any signs of wear, cracking, tearing, hardening, or warping to maintain a tight seal and prevent leaks.
Can I put juicer parts in the dishwasher?
While some juicer parts are dishwasher-safe, always consult your user manual. Many manufacturers recommend hand washing to prevent high heat from deforming plastic components or degrading rubber seals, which can lead to leaks and shorten the life of your juicer.